
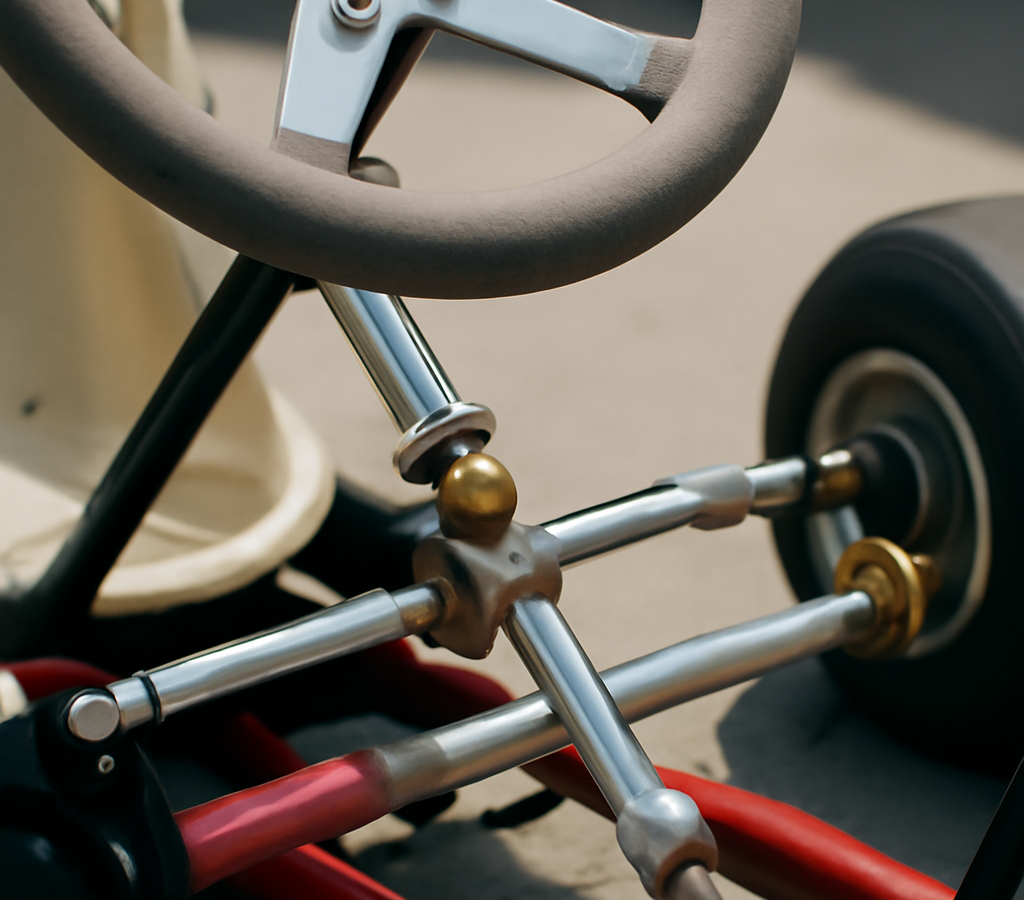
The go kart steering linkage is where steering actually happens: the tie rods, rod ends, and steering arms that translate the twist of the wheel into the angle of the front tires. Get the linkage geometry right and a kart feels telepathic; get it wrong and it darts over bumps, scrubs speed in corners, and chews through front tires. This guide explains the parts of the linkage, walks through Ackermann angle and bump steer in plain language, gives you working toe settings, and shows how to diagnose the worn joints that make an old kart wander. It is the geometry companion to our column and axle guides.
How a Go Kart Steering Linkage Works
Trace the path from your hands to the tires. The steering wheel turns the steering column, and at the bottom of that shaft sits a pitman arm (or a plate with two holes). Two tie rods connect that arm to the steering arms on the left and right spindles. Turn the wheel, the pitman arm swings, the tie rods push one spindle and pull the other, and the front wheels pivot on their kingpin bolts.
The tie rods themselves are simple: steel or aluminum tubes, typically 5/16 or 3/8 inch thread, with a rod end (heim joint) at each end. Crucially, one end is left-hand thread and the other right-hand, so spinning the rod tube lengthens or shortens the rod without disconnecting anything. That is your toe adjustment, built in.
Everything else in this article is about geometry — where those connection points sit relative to each other. The spindles, kingpins, and hubs that the linkage moves are covered in our go-kart front axle kit guide; here we own the linkage itself.
Ackermann Angle, Explained Simply
In a corner, the inside front wheel travels a tighter circle than the outside wheel, so it needs to turn more sharply. Ackermann geometry makes that happen automatically.
The trick is in the steering arms. Instead of pointing straight back from the spindles, they angle inward — as a rule of thumb, along a line aimed roughly at the center of the rear axle. Because of that inward angle, pulling the inside tie rod rotates its spindle through more degrees than pushing the outside one. The tighter the corner, the bigger the difference. No computer, no differential — just triangle geometry.
Karts actually benefit from generous Ackermann for a second reason: turning the inside wheel harder helps lift the inside rear tire, which is how a kart with a solid rear axle gets around a corner without scrubbing. If your kart pushes (understeers) into tight hairpins and the front end feels lazy, insufficient Ackermann is a common culprit. Many racing spindles offer multiple tie rod holes precisely so you can tune it.
Bump Steer and Toe: The Settings That Matter
Bump steer is the wheel steering itself when the chassis moves — hit a bump, the frame flexes or the wheel rises, and the tie rod arcs through a different path than the spindle, momentarily changing toe. The symptom is a kart that darts over curbs and washboard. The cure is geometry: the tie rods should be as close to parallel with the ground as possible at ride height, and left and right rods should be symmetrical. If your pitman arm sits much lower than the steering arms, spacers or a dropped arm can level the rods and calm the kart down noticeably.
Toe is whether the front tires point slightly toward each other (toe-in) or apart (toe-out) when the wheel is centered. For most karts, start between 0 and 1/8 inch total toe-out measured at the wheel rims. A touch of toe-out sharpens turn-in and works with Ackermann; toe-in adds straight-line stability but scrubs speed and heats tires. Off-road karts often run 0 to 1/16 inch toe-in for stability on loose ground.
Measure toe with the steering locked straight: compare the distance between the wheel rims at the front of the tires versus the back, at axle height. Adjust by spinning the tie rod tubes — half a turn at a time — then re-check and tighten the jam nuts.
Linkage Setups Compared
| Setup | Parts | Adjustability | Typical cost | Best for |
|---|---|---|---|---|
| Single tie rod (drag link) | One rod, one arm | Poor, no true Ackermann | $10–$25 | Simple yard karts only |
| Dual tie rods, fixed arms | Two rods, welded arms | Toe only | $25–$60 | Homebuilt and yard karts |
| Dual rods, multi-hole arms | Two rods, drilled arms | Toe plus Ackermann tuning | $50–$120 | Racing and serious builds |
| Racing kit with adjustable pitman | Rods, arms, adjustable plate | Toe, Ackermann, ratio | $100–$200 | Competitive sprint karts |
Cost and Considerations
Linkage parts are cheap insurance. A pair of tie rods with quality rod ends runs $25 to $60; individual 5/16 inch heim joints cost $4 to $12 each, with chromoly race-grade joints at the top of that range. A full adjustable linkage kit for a race kart lands between $100 and $200. Compare that with a single set of front tires ruined by bad toe, and the math is easy.
Buy rod ends with a load rating and a genuine jam nut for each joint, and always install tie rod ends with a bolt through the ball in double shear where the bracket allows. Cheap unbranded heims develop slop within a season. If you are sourcing a full front-end refresh, our go-kart parts guide maps out what belongs in the order.
Diagnosing Linkage Wear
Steering slop almost always lives in the joints, and finding it takes five minutes. With the kart on a stand, grab each front wheel at 3 and 9 and rock it while watching each rod end. Any visible movement between the ball and its housing means that joint is done. Then have a helper wiggle the steering wheel a few degrees each way while you watch the linkage: lost motion between wheel and tire tells you slop is stacking up somewhere in the chain.
Other tell-tales: jam nuts that have backed off (the rod length is now changing on its own, so your toe wanders), bent tie rods from curb strikes (roll each rod on a flat surface), and elongated holes in pitman or steering arms — the bolt hammers the hole oval, and no new heim joint will fix an oval hole. Feathered or scalloped front tire wear is the linkage confessing: re-check toe, then look for the worn joint that let it drift.
Pros and Cons of Upgrading Your Linkage
Moving from a basic fixed linkage to an adjustable setup is one of the cheapest handling transformations available.
Pros
- Sharper and more predictable turn-in
- Tunable Ackermann for different track layouts
- Eliminates darting and bump steer over rough pavement
- Longer front tire life with correct toe
- Inexpensive compared to almost any other handling upgrade
Cons
- More joints mean more points to inspect and maintain
- Adjustability invites bad settings without careful measurement
- Quality rod ends cost noticeably more than hardware-store parts
- Requires accurate toe measurement to see the benefit
Frequently Asked Questions
What toe setting should a go-kart run?
What is Ackermann steering on a go-kart?
Why does my go-kart dart around over bumps?
How do I know if my tie rod ends are worn out?
Can I use one tie rod instead of two on a go-kart?
How do I adjust toe on a go-kart?
Final Thoughts
A healthy go kart steering linkage comes down to three things: tight joints, level tie rods, and a deliberate toe setting. Master those and concepts like Ackermann stop being theory and become tuning tools you can feel from the seat. Inspect the rod ends every few outings, keep the jam nuts torqued, and when you upgrade, pair the linkage work with a solid overall build foundation so the geometry you set actually stays put lap after lap.