

Building your own go-kart is one of the most rewarding projects in motorsport. You end up with a machine you understand top to bottom, usually for less than a comparable finished kart. This guide explains how to build a go-kart step by step: choosing between a kit and a scratch-built frame, planning the chassis, picking an engine and drivetrain, a realistic cost breakdown, the assembly order, and the safety work that keeps a home-built kart from becoming a hazard. It is written for first-time builders with basic tools as well as fabricators planning a welded frame, and it links to every detailed guide on frames, kits, roll cages and advanced builds.
Top Picks for Your Build
These picks from our build roundups cover the frame and the rear end, the two parts most first builds start from.
| Product | Best for | Key features | Price | Buy |
|---|---|---|---|---|
| Azusa Frame w/ Steering Hoop | Best go-kart frame |
| $612.69as of Oct 25, 2026 4:20 am EDT | Buy now →Check current price |
| YC Yier 29 in Live Axle Kit | Best kit to complete a frame |
| $465.99as of Oct 25, 2026 4:20 am EDT | Buy now →Check current price |
| CILOYU 44 in 1 in Live Axle Kit | Best overall for 1 inch builds |
| $77.99as of Oct 25, 2026 4:13 am EDT | Buy now →Check current price |
| Bruce and Shark 29 in Rear Kit | Best complete compact rear end |
| $164.99as of Oct 25, 2026 4:13 am EDT | Buy now →Check current price |


Prices are Amazon’s listed prices as of the date and time shown and are subject to change; the price on Amazon at the time of purchase applies. As an Amazon Associate we earn from qualifying purchases.
Compare the full lists in the best go-kart kits, frames and engines if you are choosing a starting chassis, and the best go-kart axle kits if you already have a frame and need a complete rear end.
Step 1: Choose Kit, Roller or Scratch Build
There are three ways in, and the right one depends on your tools, budget and how much fabrication you enjoy. A full go-kart kit ships with nearly everything, often including the engine, and assembles with hand tools. A frame or roller kit gives you a pre-welded chassis and leaves you to source the engine, drivetrain, wheels and brakes. A scratch build means cutting and welding your own frame from steel tube.
For most first-timers a kit or roller is the better choice. You still learn every system during assembly, but you skip the hardest and most safety-critical step: building a rigid, square frame. Our DIY go-kart kit guide explains what each kit level includes, and go-kart kits to build compares the common designs. If you want a bare welded frame to build around, the go-kart frame kit guide covers what to check.
Scratch builds give total control over wheelbase, seat position and style, but they need a welder, a chop saw or band saw, a flat surface to build on and real welding experience. Many builders do one kit build first, then move to a scratch frame once they understand how everything fits.
Step 2: Plan the Frame
The frame is the foundation, and mistakes here are expensive to fix later. Our go-kart frame guide covers layouts and materials, and go-kart frame plans explains how to read and adapt published drawings rather than designing from a blank sheet.
Start from the driver: seat position, pedal reach and steering wheel height set the frame length and cockpit width. Then place the engine, rear axle and front spindles. Wheelbase and track width affect stability and turning; racing designs follow tighter conventions, which our racing go-kart frame dimensions guide covers. Two-seat karts need a wider, stronger layout, explained in the 2-seater go-kart frame guide.
Material choice matters. Mild steel tube is the standard for home builds because it is affordable and easy to weld; steel tubing for go-kart frames explains sizes, wall thickness and grades. A wood go-kart frame can work for a slow, low-powered kart, but it has clear limits on strength and engine size. For welded frames, our go-kart welding kit guide lists the welder type and safety equipment you need.
Build the frame on a flat, level surface, tack everything first, and check that it is square by measuring diagonals before final welding. A twisted frame never handles properly, however good the parts bolted to it.

Step 3: Gather the Parts
Every gas go-kart uses the same core systems. Work front to back and confirm sizes as you go, because axle diameter, bearing bore, keyway, chain pitch and clutch bore all have to match.
- Frame or roller – the welded steel chassis everything bolts to.
- Engine – a horizontal-shaft small engine; 212cc-class engines are the most common choice for first builds. See our go-kart engine hub.
- Clutch or torque converter – transfers power from the crankshaft to the axle.
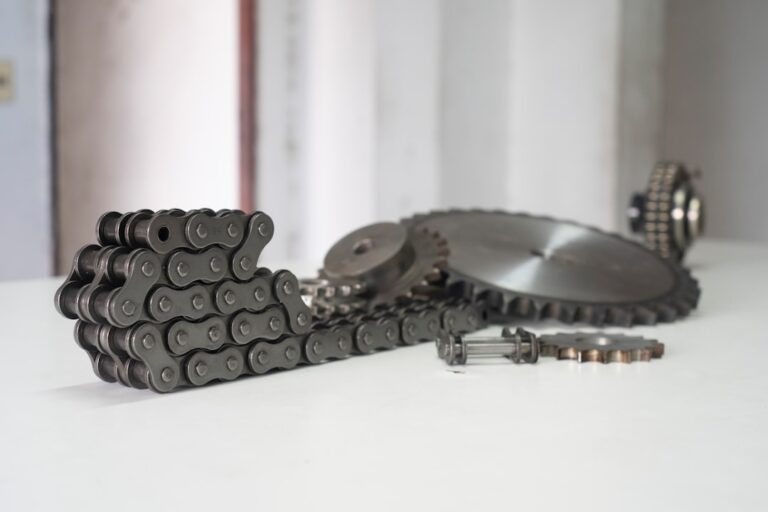
- Live axle, bearings and hubs – the rear axle carries the driven sprocket, wheels and brake rotor; our live axle guide explains sizing.
- Chain and sprockets – the ratio sets acceleration versus top speed; see go-kart sprockets.
- Brakes – a hydraulic disc brake is the safest common choice.
- Steering – spindles, tie rods, column and wheel, ideally from a matched kit.
- Wheels and tires – slick, turf or knobby depending on where you drive.
- Seat, pedals, throttle cable, kill switch and safety gear.
Our go-kart parts hub covers brakes, steering, wheels, seats and pedals in detail, so use it to check fitment before you order.
Step 4: Budget the Build
Costs vary with how much you buy new versus salvage. The table shows rough USD ranges for a single-seat gas kart built on a purchased frame with mostly new parts. Treat them as planning figures, not quotes; prices change and specific products sit above or below these ranges.
| Component | Typical range (USD) |
|---|---|
| Frame or roller kit | $300 – $600 |
| Engine (212cc class) | $150 – $300 |
| Clutch or torque converter | $40 – $200 |
| Live axle, bearings, hubs | $80 – $200 |
| Chain and sprockets | $30 – $70 |
| Brake kit | $50 – $150 |
| Wheels and tires | $100 – $250 |
| Steering, seat, pedals, throttle, hardware | $100 – $250 |
| Typical total | about $850 – $2,000 |
A scratch build can lower the frame cost if you already own a welder and tube, but savings are modest once you add consumables, paint and the parts you break along the way. For a line-by-line breakdown, see how much it costs to build a go-kart, and compare that with a finished kart in our go-kart cost guide.

Step 5: Assemble in the Right Order
With parts on the bench, the order of assembly matters. This sequence avoids rework:
- Prep the frame. Deburr welds, check that the chassis sits square, and mount the rear bearing hangers so everything else references the axle line.
- Install the live axle. Slide on the hubs, driven sprocket and brake rotor, then set the bearing collars so the axle spins freely with no side play.
- Mount the engine. Bolt an adjustable engine mount to the frame so you can slide the engine to tension the chain.
- Fit the drivetrain. Install the clutch or torque converter, align the sprockets with a straightedge, then fit and tension the chain to the maker’s slack figure.
- Plumb the brakes. Mount the caliper, connect the master cylinder to the pedal, run the line and bleed the brakes until the pedal is firm.
- Add steering, seat and controls. Fit spindles, tie rods and column, set toe, then mount the seat, pedals, throttle cable and kill switch.
- Wheels and shakedown. Torque the wheel fasteners, recheck every bolt, then test slowly in an open area, brakes first, before using full throttle.
Use thread locker or locking nuts where vibration could loosen hardware, and re-torque everything after the first few runs.
Engine and Drivetrain Basics
The engine and drivetrain decide how the kart feels. A 212cc-class four-stroke is the usual first-build engine because it is inexpensive, widely supported and simple to maintain; our Predator 212 engine hub covers the most popular example. Check the crankshaft diameter of your specific engine before buying a clutch, since bores must match. Beginners should leave the speed governor in place until the chassis, brakes and steering have proven themselves.
A centrifugal clutch is cheap and compact but can slip and overheat on hills or with heavy drivers. A torque converter varies the ratio automatically, giving stronger launches and a higher top speed without shifting. Our comparison of a torque converter vs clutch explains which suits your build.
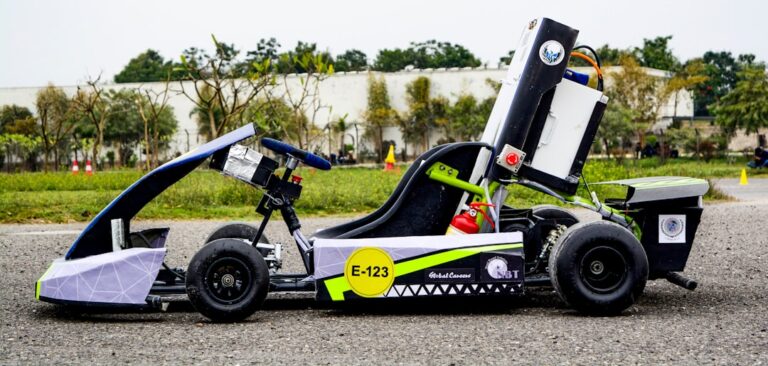
Final gearing sets the balance between acceleration and top speed: a larger axle sprocket gives more acceleration and hill climbing, a smaller one more top speed. Start conservative and change sprockets once you know how the kart behaves. If you would rather skip gas entirely, our homemade electric go-kart guide covers motors, batteries and controllers.
Roll Cages and Safety
A go-kart is a real vehicle, and a home build puts the responsibility on you. Never skimp on brakes, always fit a kill switch the driver can reach, guard the chain and clutch so nothing can catch clothing, and wear a helmet every time.
Off-road and recreational karts that might roll should have a cage. Our go-kart roll cage guide explains tube sizes, bracing and mounting, and a roll cage kit is an option if you would rather not design one. A cage only works with seat belts that keep the driver inside it. If you are buying a caged kart instead of building one, see go-karts with roll cages and, for passenger models, what to check on a two-seater go-kart with roll cage.
Racing karts are different: they normally have no cage and no belts, and are built to the rules of the sanctioning body. Follow those rules and the chassis maker’s manual rather than adding parts by guesswork.

Advanced Builds: Racing, Shifter and Cycle Karts
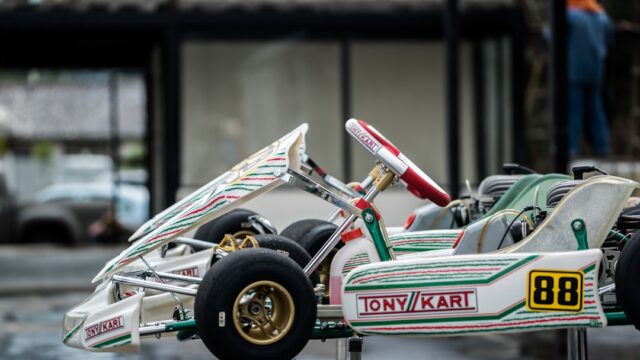
Once you have built a basic fun kart, there are several directions to grow. A racing go-kart frame uses thin-wall chromoly tube and is designed to flex in a controlled way, which is why most racers buy proven chassis rather than welding their own. The best go-kart chassis roundup covers ready-made options.
A shifter kart build pairs a racing chassis with a high-revving gearbox engine, and needs stronger brakes and more experience to drive. Our shifter kart chassis guide explains how those frames differ.
Cycle karts take the opposite approach: vintage-styled, narrow-tired machines that prize style over speed. Our cycle kart kits guide covers plans, parts and costs. For any build, a body kit is the final touch once the mechanicals are finished.
Buying a Used Frame or Rolling Chassis
A used frame can cut costs significantly, but inspect it carefully. Look for cracked welds around the engine mount, steering and bearing hangers, bent tubes, and frames that do not sit flat. Our guide to used go-kart frames for sale lists the checks.
A rolling chassis, a frame already fitted with axle, wheels, steering and often brakes, can be the fastest route to a running kart. See go-kart rolling chassis for sale for what to expect, and go-kart frames for sale for new options.

Explore Every Build Guide
Go-kart kits






Frames and roll cages




Shifter, cycle kart and track projects




Frequently Asked Questions
How much does it cost to build a go-kart?
Can I build a go-kart without welding?
What engine should a beginner use?
Do I need a torque converter or a clutch?
How fast will a home-built go-kart go?
How long does a build take?
What tools do I need for a kit build?
Final Thoughts
Building a go-kart is achievable for anyone willing to plan carefully and work in order. Start with a proven frame or roller, choose a well-supported engine, never compromise on brakes, and test slowly. When you are ready to buy, start with our kits and frames roundup, then use the maintenance guide to keep the finished kart running.