
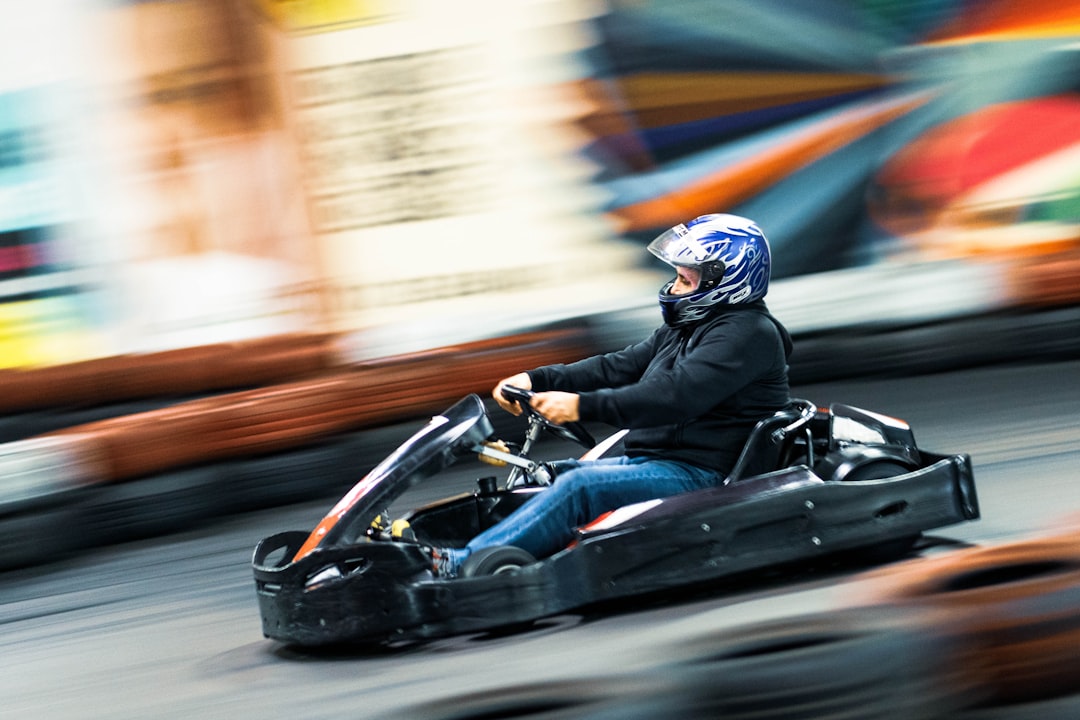
A go kart electric conversion kit lets you swap a gas engine for an electric drivetrain without designing one from scratch. You buy a matched set of motor, controller, throttle and usually a mounting plate, bolt it where the old engine sat, and add a battery pack you source separately. For most adult yard karts a 48V brushless kit of roughly 1.5 to 3kW is the sensible starting point, and a complete conversion typically costs $600 to $1,500 once the battery, charger and safety hardware are counted. This guide explains what kits include, how the power tiers differ, how to size the battery, how to install and gear the kit, and the electrical safety basics that make the conversion reliable.
Part of our Electric Go-Karts guide — explore the full guide →
What a Go Kart Electric Conversion Kit Includes
A conversion kit is the drivetrain, not the whole electric system. The typical box contains a brushless DC (BLDC) motor, a controller matched to that motor, a hall-effect throttle (twist grip, thumb lever or foot pedal), a wiring harness, a small drive sprocket for the motor shaft and, often, a motor mounting bracket.
Better kits add a keyed ignition switch, a battery voltage display, a main contactor or circuit breaker and a reverse switch. Cheaper kits may ship with little more than the motor, controller and throttle, plus a wiring diagram that assumes you already know what you are doing.
What kits rarely include: the battery pack, the charger, a battery box, main battery cables, a main fuse and the parts needed to adapt your chain pitch. On most builds the battery is the single largest expense, so read the listing carefully before comparing kit prices. Our roundup of the best electric motors for go-karts covers motor and kit options in more depth.
Conversion versus scratch build
Converting reuses your existing frame, steering, brakes, seat and rear axle. That cuts the job down to removing the engine, mounting the motor, gearing it and wiring it. If you do not own a donor kart, or your frame is tired, a scratch build lets you design around the battery from day one. Our guide to homemade electric go-karts covers that route.
Conversion Kit Power Tiers
Kits are sold by motor power and system voltage. Treat the power figure as a rough guide: rated (continuous) power and peak power are often quoted interchangeably, and real performance depends on the controller current limit, gearing, tire size and total weight.
Up to about 1kW (24 to 48V). Suited to children’s karts and light teen karts. Gentle, predictable acceleration and modest battery demands. Kits commonly sit around $100 to $300.
About 1.5 to 3kW (48 to 60V). The usual choice for adult backyard karts. These kits generally match or beat the off-the-line feel of a small single-cylinder gas engine, because electric motors deliver strong torque from a standstill. Expect roughly $200 to $500 for the kit.
3kW and above (60 to 72V or more). For experienced builders with a strong chassis and good brakes. Current draw, cable sizes and battery cost all rise steeply, and the kart can outrun the brakes and steering of a basic yard frame. Kits typically run $400 to $1,000 or more.
Hub and dual-motor layouts. Some kits use hub motors in the rear wheels or two motors driving separate sides. They can work well, but the single motor chained to a live axle remains the simplest layout to install, gear and repair on a converted kart.
Best Electric Motor for Go-Karts: our top 3 picks
| Product | Best for | Key features | Price | Buy |
|---|---|---|---|---|
| doinal KR5V 72V 5000W kit | Best overall |
| $389.90as of Oct 26, 2026 7:08 am EDT | Buy now →Check current price |
| doinal 72V 3000W kit | Best 3kW adult conversion |
| $279.90as of Oct 26, 2026 7:08 am EDT | Buy now →Check current price |
| doinal 48V 2000W kit | Best 48V build |
| $269.90as of Oct 26, 2026 7:08 am EDT | Buy now →Check current price |


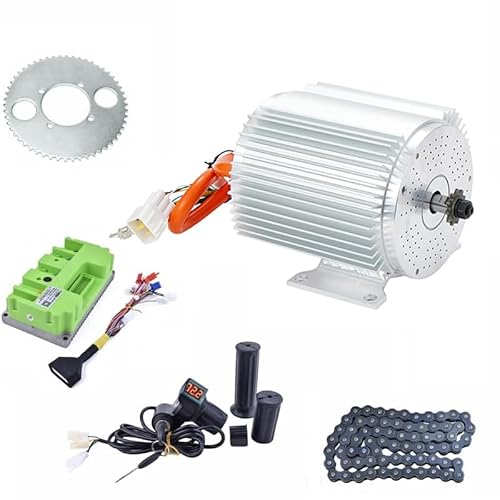
Prices are Amazon’s listed prices as of the date and time shown and are subject to change; the price on Amazon at the time of purchase applies. As an Amazon Associate we earn from qualifying purchases.
Kit Tiers Compared
| Tier | Typical voltage | Best for | Battery to plan for | Typical kit price |
|---|---|---|---|---|
| Up to 1kW | 24–48V | Kids and light teen karts | Modest capacity, low current | $100–$300 |
| 1.5–3kW | 48–60V | Adult yard and trail karts | 48–60V lithium, 20Ah or more | $200–$500 |
| 3kW and up | 60–72V+ | Experienced builders, strong chassis | High-discharge lithium, larger capacity | $400–$1,000+ |
| Small gas engine (reference) | — | Familiar baseline | Fuel tank | Varies by engine |
Top speed is deliberately left out of the table. It is set mostly by gearing, tire diameter and motor rpm, so two karts with the same kit can differ widely. Check the kit maker’s figures and treat them as a best case.
Sizing the Battery Pack
Battery choice drives range, performance and a large share of the budget. Work through three numbers in order.
Voltage. Match the pack’s nominal voltage to the controller’s rated input. A controller built for 48V nominal will not tolerate a 72V pack, and an undersized pack will cut out early under load.
Capacity. Amp-hours multiplied by voltage gives watt-hours, the energy in the pack. A 48V 20Ah pack holds about 960Wh. How long that lasts depends on driving style, terrain, tires and rider weight, so plan conservatively and size up if you drive on grass or hills.
Discharge rating. This is the number people skip. The pack and its battery management system (BMS) must be rated to supply the controller’s continuous current and its peak current without tripping or overheating. Check the controller’s current limit and buy a pack and BMS rated above it.
For chemistry, LiFePO4 is a common default for karts because it is thermally more stable and tolerates many cycles. Lithium-ion (NMC) packs are lighter for the same energy but need careful protection. Sealed lead-acid is cheap but heavy and sags under high current, which blunts performance. Our guide to batteries for electric go-karts goes deeper on the options.
Electrical Safety Basics
A converted kart carries a battery that can deliver very high current into a short circuit. The goal of the safety hardware is simple: if something fails, the circuit opens before wires overheat.
- Main fuse or breaker. Fit a DC-rated fuse or breaker on the positive lead as close to the battery as practical. Size it for the wire and the controller current, using the component maker’s guidance rather than guesswork.
- Battery management system. Every lithium pack needs a BMS that guards against over-charge, over-discharge, over-current and cell imbalance. Do not run bare lithium cells.
- Disconnect you can reach. A key switch, contactor or emergency disconnect that the driver can operate from the seat lets you kill power instantly.
- Correct cable gauge. Size cables to the current they carry and keep battery runs short. Use proper crimps and heat-shrink on every terminal.
- Insulation and routing. Keep cables away from the chain, sprockets, brake rotor and sharp frame edges, and secure them so they cannot rub through.
- Higher-voltage packs. As system voltage climbs, especially past 60V, the shock risk and arc energy rise. Cover terminals, work with the pack disconnected, and if you are unsure, have someone experienced in high-voltage DC work check the installation.
Charge lithium packs with the charger specified for that pack, on a non-flammable surface, and never leave a charging pack unattended for long periods. A damaged, swollen or crashed pack should be taken out of service.
How to Install a Conversion Kit
Installation follows a predictable order. Expect a weekend or two if the donor kart is in good shape.
- Strip the gas system. Remove the engine, fuel tank, fuel lines, throttle cable and clutch or torque converter.
- Mount the motor. Bolt the motor to the existing engine plate or the kit bracket. Slotted mounts make chain tension adjustment easy.
- Align the drive. The motor sprocket must sit in the same plane as the axle sprocket. Misalignment is a common reason chains throw or wear quickly under electric torque.
- Set the gearing. Electric motors spin faster than small gas engines, so reduction ratios often differ. Start with the kit maker’s recommended ratio for your tire size and adjust from there.
- Mount the battery. Place it low and near the center of the frame, in a box or tray strapped so it cannot shift.
- Wire it up. Mount the controller where it gets airflow and stays dry. Connect the motor and throttle first, and the battery last through the fuse and disconnect.
- Test in stages. Run it with the rear wheels off the ground, then at low speed with the controller current limit turned down, then at full power once brakes and wiring check out.
The donor kart matters. Worn axle bearings, a stretched chain or weak brakes do not get better with electric torque. Refresh consumables during the swap; our go-kart parts guide lists the usual suspects.
Cost of a Complete Conversion
Budget the whole system, not just the kit. Typical ranges for an adult 48V conversion:
- Conversion kit: $200 to $500
- Lithium battery with BMS: $300 to $800, more for larger capacity or higher voltage
- Charger: $40 to $150 if not bundled with the pack
- Fuse or breaker, disconnect, cables, connectors and battery box: $50 to $150
- Sprocket, chain or mounting adapters: $20 to $80
That puts a typical adult conversion around $600 to $1,500 on top of the kart you already own. For comparison with buying a ready-made machine, see our complete guide to electric go-karts.
Pros and Cons
Pros
- Reuses your existing frame, brakes and steering to save money and time
- Strong low-speed torque with no clutch to tune
- Much quieter than a gas engine, which suits neighborhoods
- Battery placement freedom can improve weight balance
Cons
- The battery pack often costs more than the kit itself
- Run time per charge is limited and recharging takes hours
- Budget kits can ship with thin documentation and unlabeled wiring
- Chain pitch and mounting mismatches with the donor kart are common
Maintenance After the Swap
Electric drivetrains need less routine work than gas engines, but not none. Check chain tension and sprocket alignment regularly, because instant torque loads the chain harder than a centrifugal clutch does. Inspect cable terminals for heat discoloration or looseness, keep the controller and connectors dry, and store lithium packs partly charged in a cool place over winter rather than full or empty.
Frequently Asked Questions
What size conversion kit replaces a small gas engine?
Are batteries included in go-kart conversion kits?
How hard is it to convert a gas go-kart to electric?
How long will a converted electric kart run per charge?
Do I need to change my gearing after converting?
Is a fuse really necessary on a low-voltage kart?
Final Thoughts
A go kart electric conversion kit is the most direct route to an electric kart if you already have a sound gas kart. Choose a tier that suits the driver and chassis, spend properly on a lithium pack with a BMS rated for your controller, and treat fusing, cable sizing and chain alignment as the parts of the job that deserve the most care. If you have no donor kart, start with the homemade electric go-kart guide instead.