
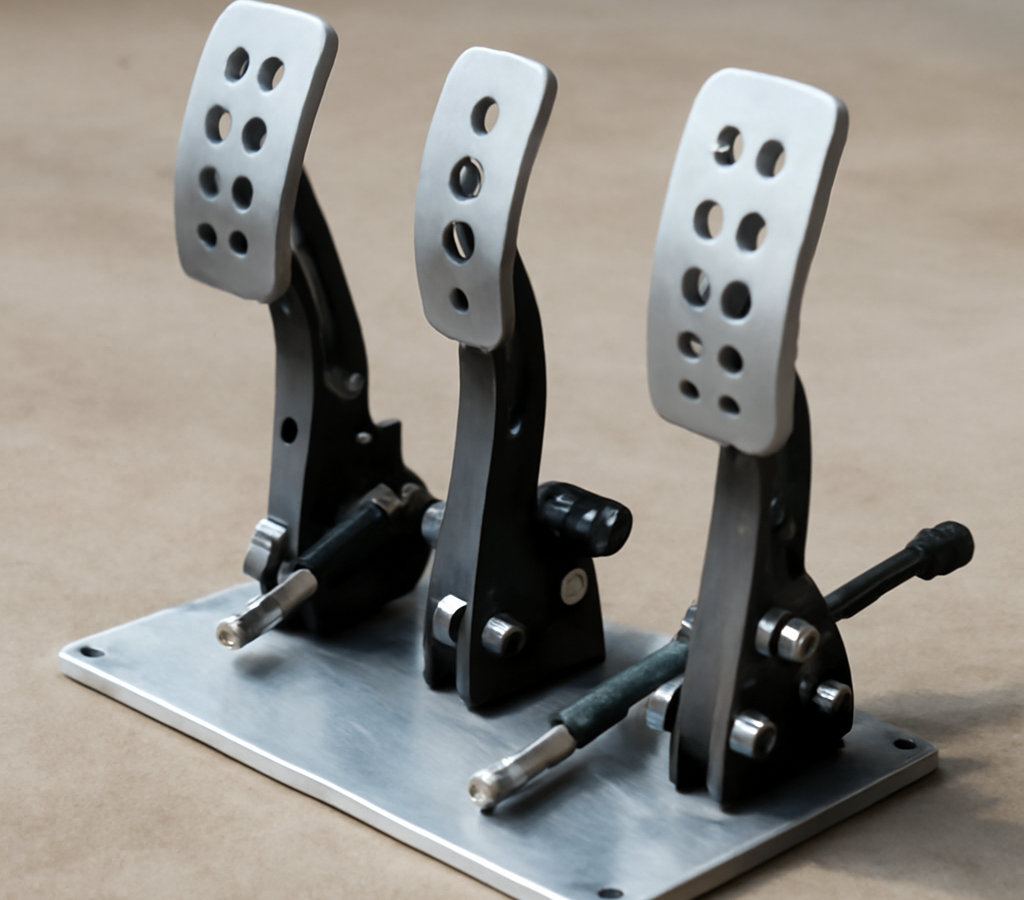
A go kart pedals kit is one of those unglamorous purchases that decides how a kart actually feels to drive. Throttle response, braking confidence, and even driver fatigue all trace back to two levers bolted to the front of the frame. Whether you are replacing bent pedals on a yard kart, finishing a scratch build, or setting up a kart that multiple kids of different heights will share, the details matter: pedal type, mounting style, cable versus linkage actuation, and where the pedals sit relative to the seat. This guide walks through all of it so you buy once and set it up right.
How a Go Kart Pedals Kit Works
A pedal kit is a pair of throttle and brake pedal assemblies plus the hardware to connect them to the engine and brake. The throttle pedal pulls a cable that opens the carburetor (or, on electric karts, actuates a throttle sensor). The brake pedal pushes or pulls on the brake system — a cable to a band brake, a rod linkage to a mechanical disc, or a master cylinder on hydraulic setups.
Two design points do most of the work. First, the return spring: the throttle must snap fully closed the instant your foot lifts, which is a genuine safety system, not a convenience. Kits should include (or you should add) a dedicated return spring at the pedal in addition to the one at the carb. Second, leverage: the pedal is a lever, and where the cable or rod attaches along it sets how much force reaches the brake. A brake pedal that feels soft is often a leverage problem, not a brake problem.
Most kits use a US convention of throttle on the right, brake on the left, matching cars. Keep that convention — muscle memory matters in a panic stop.
Types of Pedal Kits
Standard stamped-steel yard kart pedals. The classic L-shaped or loop pedals on pivot bolts, sold in cheap pairs. Fine for kids karts and light use; they bend under adult panic braking and the pivot holes wallow out over time.
Heavy-duty welded pedal assemblies. Thicker steel, bronze or nylon pivot bushings, and welded gussets. The right call for adult karts and off-road use. Usually $30 to $70 per pair.
Racing-style aluminum pedal sets. CNC or cast aluminum pedals with adjustable pads and provision for a master cylinder pushrod. Found on racing chassis and higher-end builds at $60 to $150+.
Adjustable-position kits. Pedals on a sliding or multi-hole mount so the reach can move fore and aft. Worth every penny on a kart shared between drivers of different heights — moving the pedals is far easier than moving a mounted seat.
Cable versus linkage actuation. Cable systems (throttle especially) are cheap, flexible to route, and forgiving of frame flex, but they stretch and can stick if the housing kinks or corrodes. Rod linkages are precise and durable for brakes on rigid frames, but every joint needs a cotter-pinned clevis and they transmit frame vibration. The common-sense pairing on a yard kart: cable throttle, rod or cable brake depending on your brake type, hydraulic line if you run a master cylinder.
Pedal Kit Options Compared
| Type | Actuation | Best for | Durability | Typical price |
|---|---|---|---|---|
| Stamped steel pair | Cable | Kids and light yard karts | Low–medium | $15–$35 |
| Heavy-duty welded | Cable or rod | Adult and off-road karts | High | $30–$70 |
| Racing aluminum | Rod or hydraulic | Racing chassis, premium builds | High | $60–$150+ |
| Adjustable-position | Cable or rod | Multi-driver family karts | Medium–high | $40–$100 |
Cost and Considerations
A complete pedal refresh is one of the cheapest meaningful upgrades on a kart: $20 to $60 for pedals, $10 to $20 for a throttle cable with housing, $10 for springs, clevises, and cotter pins. Even a full racing-style setup with a new master cylinder rarely passes $200. In the context of a whole build budget, this is not the place to save $15 on pedals that flex — see how much a go-kart costs for where the real money goes.
Check compatibility before ordering. Pedal kits mount either to pre-welded tabs, by through-bolt to the frame rail, or with weld-on brackets included in the kit. If your frame has no tabs, buy a kit with clamp-on or weld-on mounts, and confirm the pivot bolt diameter (5/16 in and 3/8 in are common). Confirm cable end fittings too — barrel ends and clevis ends are not interchangeable without adapters.
Throttle safety is worth repeating: dual return springs, a smooth cable run without kinks tighter than about a 4-inch radius, and a kill switch within the driver reach. A sticking throttle on a kart with a marginal brake is the classic yard-kart accident, and every part of that chain costs under $15 to do right.
Positioning and Install Tips
Set pedal position from the seated driver, not from the frame drawings. With the driver belted in, the leg should keep a slight bend (roughly 20 to 30 degrees at the knee) when the pedal is fully depressed. A leg that goes dead straight cannot modulate the brake; a leg too cramped tires quickly and can catch the knee on the steering shaft.
For karts shared across leg lengths, adjustable pedal mounts or a series of mounting holes drilled in the pedal support tube let you tune reach in minutes. Some builders instead fit pedal extension blocks for the shortest driver — acceptable, but keep them clear of each other so a foot cannot press both pedals at once. Angle the pedal faces so the ball of the foot lands flat at mid-travel.
On installation: mount pedals so full brake travel bottoms on a stop, not on the master cylinder or band lever limit. Route the throttle cable away from exhaust heat and the chain run. Grease pivots on assembly and re-check cotter pins after the first hour of driving — new linkages settle. If you are doing this as part of a full build, the pedal stage comes right after steering in our walkthrough on how to build a go-kart, and pedal hardware standards are covered in the go-kart parts guide. Many of the best go-kart kits and frames include basic pedals, so check before double-buying.
Pros and Cons of Aftermarket Pedal Kits
Upgrading pedals is cheap and high-impact, with a few caveats on fitment.
Pros
- Big improvement in brake feel and throttle control for under $70
- Adjustable kits let one kart fit kids and adults properly
- Complete kits include springs, cables, and clevises that match
- Heavy-duty pedals survive panic braking that bends stamped units
Cons
- Mounting tabs and pivot sizes vary, so fitment needs checking
- Cheap cables stretch and can stick without regular lubrication
- Rod linkages need precise geometry to avoid binding
- Racing aluminum sets are overkill on a basic yard kart
Frequently Asked Questions
Which side is the throttle on a go-kart?
What does a go-kart pedal kit include?
Cable or rod linkage — which is better for the brake?
How far should pedals be from the seat?
Why does my throttle pedal stick?
Can I move the pedals for a shorter driver?
Final Thoughts
A good go kart pedals kit costs less than a tank-and-a-half of weekend fuel and transforms how controllable a kart feels. Buy heavy-duty or adjustable units over stamped bargain pairs, insist on dual throttle return springs, and set the reach from the seated driver knee angle. Get those right and the pedals disappear — which is exactly what good controls should do. For everything else bolted to the chassis, start with our go-kart parts guide.