
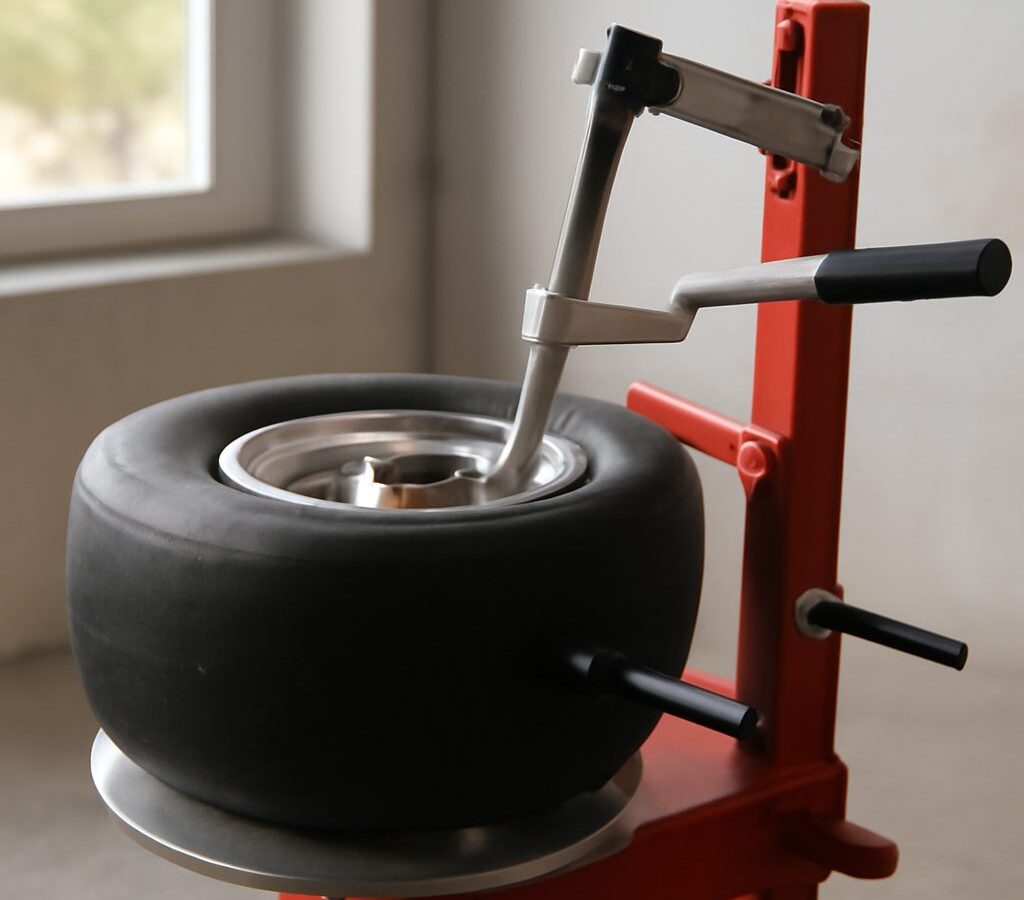
A go kart tire changer is a small, kart-specific tool that breaks the tire bead and holds the wheel steady so you can swap tires without wrecking soft aluminum or magnesium rims. For anyone who races or practices regularly, it is one of the first workshop tools worth owning: kart tires wear out quickly, shop mounting fees add up, and levering tires off by hand is slow and hard on rims. Most racers end up with a bench-mount manual changer at home, sometimes paired with a portable bead breaker for the trailer. This guide explains how kart tire changers work, the main types, typical costs, what to check before you buy, and the technique that turns a tire change into a quick, routine job.
Part of our Go-Kart Parts guide — explore the full guide →
What Is a Go-Kart Tire Changer and How Does It Work?
A kart tire changer does two jobs. First, it breaks the bead, which is the stiff edge of the tire that seals against the rim flange. Second, it holds the wheel securely while you work the old tire off and the new one on.
The bead is the hard part. After a few sessions, heat and pressure bond it tightly to the rim, and prying it loose with a screwdriver is how rims get gouged. A changer uses a lever-driven foot, wedge, or clamp to push the bead inward in a controlled way, away from the rim edge, so the force goes into the rubber instead of the metal.
Once the bead is free, the wheel sits on a post or plate that keeps it from spinning or sliding. You then use the rim’s drop center (the narrower channel in the middle of the wheel) to create slack, which lets the bead climb over the flange without brute force.
Kart tires are different from car tires in ways that shape the tool:
- Small wheels. Sprint karts typically run 5-inch rims front and rear, with 6-inch rims common on many rear setups and on some recreational and rental karts. Off-road and yard karts may use larger sizes.
- Soft rims. Racing wheels are usually cast aluminum or magnesium and scratch or dent easily.
- Low pressures. Running pressures for racing slicks are low compared with road tires, so the beads are designed to seal at modest pressure.
- Thin, flexible sidewalls on racing compounds, versus much stiffer sidewalls on treaded and off-road tires.
That combination calls for controlled force in a compact package, not the hydraulic power of a car tire machine. If you need a refresher on wheel and tire sizing before buying any tool, our go-kart tire sizes guide explains how kart sizes are written and which rim widths go with which tires.
Types of Kart Tire Changers
Bench-mount manual changers. This is the standard racer setup: a steel fixture that bolts to a workbench, trailer wall, or floor stand, with a bead-breaker arm and a center post or plate for the wheel. They have few moving parts, last for many years, and become fast once you have the motion down. Most are designed around common 5-inch and 6-inch kart rims, sometimes with adapters for other sizes.
Portable bead breakers. These are compact lever presses or clamp-style tools built to break the bead and nothing else. Mounting is still done by hand with levers and rim protectors. They are useful at the track when you need to swap a damaged tire between sessions and the bench changer is at home.
Combination stands. Some units combine a wheel holder, bead breaker, and a mount or demount bar on a single upright stand. They take more floor space but less bench space, and they suit a garage where the bench is already crowded.
DIY builds. Plenty of karters fabricate their own bead breaker from steel plate, a lever, and a post that matches their wheel’s bolt pattern. A homemade tool can work well if it is rigid and the contact face is padded. Expect to spend more time on it than you would expect.
Automotive tire machines. Full-size machines are built for much larger wheels and stiffer beads. Their clamps and mounting heads often cannot grip small kart rims safely, which is why many tire shops still mount kart tires by hand. For a deeper look at shop-style equipment and where it does or does not fit karting, see our guide to the go-kart tire machine.
Best Go Kart Tires: our top 3 picks
| Product | Best for | Key features | Price | Buy |
|---|---|---|---|---|
| SunF K001 11x7.10-5 slick | Best overall rear slick |
| $77.98as of Oct 26, 2026 5:22 am EDT | Buy now →Check current price |
| SunF K001 10x4.5 front set | Best front slicks |
| $134.96as of Oct 26, 2026 5:22 am EDT | Buy now →Check current price |
| Kemblawolf 5 in wheel set | Best complete 5-inch set |
| $389.89as of Oct 26, 2026 5:22 am EDT | Buy now →Check current price |


Prices are Amazon’s listed prices as of the date and time shown and are subject to change; the price on Amazon at the time of purchase applies. As an Amazon Associate we earn from qualifying purchases.
Kart Tire Changer Options Compared
| Option | Typical cost (USD) | Best for | Limitations |
|---|---|---|---|
| Bench-mount manual changer | About $80–$300 | Racers changing tires several times a season | Needs a solid bench or stand |
| Portable bead breaker | About $40–$150 | Trackside changes and travel | Mounting still done by hand |
| Combination stand | About $150–$400 | Garages with floor space to spare | Bulkier; harder to transport |
| DIY build | Often under $75 in materials | Fabricators on a budget | Your time; quality depends on the build |
| Kart shop mounting | Varies by shop; often charged per tire | Owners who change tires rarely | Costs add up; depends on shop hours |
These ranges are typical market prices, not quotes. Costs vary by region, material, and whether accessories like rim protectors or adapters are included.
Is a Go Kart Tire Changer Worth the Cost?
Do the math against your schedule. If you race or practice regularly, tire changes become a routine part of every few weekends. Paying a shop each time, plus the drive to drop off and collect wheels, often costs more than a basic bench changer within a season or two. If you swap tires once a year on a backyard kart, paying a shop or mounting by hand is usually the sensible choice.
Budget for the supporting items as well, since the changer alone is not enough:
- Tire mounting lubricant or a mild soap solution
- A valve core tool and spare valve cores
- Plastic rim protectors and plastic or nylon-tipped tire levers
- An accurate low-pressure gauge with fine graduations
- An air compressor or a tank that can deliver a quick burst to seat beads
Many racers keep these items together in a dedicated tire kit. Our kart racing tools guide covers the rest of the toolbox, and our hub on go-kart parts lists the spares worth keeping on the shelf.
One honest caveat: soft racing compounds mount easily, but stiff treaded, rain, and off-road tires take more effort and better technique on the same tools. If you mostly run off-road tires, look for a sturdier frame and a bead breaker with more leverage.
How to Choose a Kart Tire Changer
Use this checklist before buying any bench or portable unit:
- Wheel fit. Confirm the changer supports your rim diameters and widths. Check whether the center post or mounting plate matches your wheel’s bolt pattern or center bore, or whether it needs an adapter.
- Rim protection. The bead-breaker foot should have a rubber, nylon, or plastic contact face. Bare steel on magnesium rims is a recipe for gouges.
- Frame construction. Welded steel is preferable to thin cast parts that can crack under lever load.
- Mounting options. Decide whether it will live on a bench, a trailer wall, or its own stand, and whether you want to take it to the track.
- Leverage. A longer handle makes stubborn beads easier, especially on older tires that have bonded to the rim.
- Parts and support. Replaceable pads and wear parts extend the tool’s life.
Regular racers usually do best with a bench-mount unit at home and, if they travel, a portable bead breaker in the trailer. Occasional owners can skip both.
How to Change Kart Tires With a Changer
Technique matters as much as the tool. The steps below are the general approach; our full walkthrough on how to change go-kart tires goes into more detail.
Removing the old tire
- Deflate the tire completely and remove the valve core.
- Mount the wheel on the changer and break the bead on one side, working around the wheel in short presses. Flip the wheel and break the other side. Both beads must be fully free before you start levering.
- Lubricate the bead and rim edge generously.
- Push the bead opposite your working point down into the drop center. This creates the slack you need.
- Using rim protectors, lever a small section of the top bead over the flange, then work around in small bites. Repeat for the bottom bead.
Mounting the new tire
- Check the tire’s rotation arrow and the correct side for your wheel before mounting. Many racing tires are directional.
- Clean the rim’s bead seat. Old rubber and dirt cause slow leaks.
- Lubricate both beads and the rim flange.
- Work the bottom bead on first and keep it in the drop center.
- Walk the top bead over the flange with your palms, keeping the opposite side in the drop center.
- Reinstall the valve core, then seat the beads with short bursts of air while watching both sides seat evenly.
- Never exceed the maximum seating pressure stated by the tire or wheel manufacturer. Once seated, bleed down to your running pressure.
After mounting, check for leaks with soapy water around the bead and valve. Some racers mount tires a day ahead so they can confirm pressure holds overnight. For what to do before a new set goes on track, our go-kart tire prep guide covers scuffing, pressures, and heat cycles.
Safety and Maintenance
Tire changing is low risk, but a few habits prevent injuries and damaged equipment:
- Keep hands clear of the bead-breaker foot. Lever tools generate a lot of force at the contact point.
- Stand to the side when seating beads. A bead that seats suddenly, or a tire that is overinflated, can release energy quickly.
- Wear eye protection. Lubricant, debris, and the occasional flying valve core are common.
- Inspect wheels every change. Look for cracks near the bead seat and bolt holes, especially on magnesium rims. Replace any cracked wheel.
The changer itself needs very little maintenance. Keep the pivot points lightly oiled, wipe off lubricant residue so it does not trap grit, replace worn contact pads before bare metal shows through, and check that mounting bolts stay tight.
Pros and Cons
Owning your own changer is a clear win for regular racers, with a few honest drawbacks.
Pros
- Often pays for itself within a season or two of regular racing
- Fast, repeatable tire changes at home or trackside
- Much lower risk of scratched or gouged rims than improvised tools
- Simple steel tools that can last many years
Cons
- Upfront cost of the tool plus compressor and supplies
- Learning curve: the first few changes are slow
- Bench units need permanent mounting space
- Overkill for owners who change tires once a year
Frequently Asked Questions
Can I change go-kart tires without a tire changer?
Will a car tire machine work on kart tires?
How much does a go-kart tire changer cost?
What pressure is needed to seat a kart tire bead?
Do go-kart tires need balancing after mounting?
How often do kart tires need changing?
Final Thoughts
A go kart tire changer turns one of the most frequent jobs in karting into a quick, controlled routine. Regular racers should buy or build a solid bench-mount unit and consider a portable bead breaker for race weekends; occasional owners can keep paying a shop. Whatever you choose, learn the drop-center technique, use plenty of lubricant, and protect your rims, since good wheels cost more than the tool. When it is time for a fresh set, our roundup of the best go-kart tires covers options for racing, rental-style, and off-road use.